
How to Install Java in Windows 11?
Are you looking to get the latest version of Java installed on your Windows 11 machine? Installing Java on Windows 11 is a relatively easy process, but there are a few key steps you will need to take to ensure the installation is successful.
In this article, we'll provide a comprehensive guide on how to install Java on Windows 11, as well as tips and tricks to ensure the process is smooth and hassle-free.
How to Install Java in Windows 11?
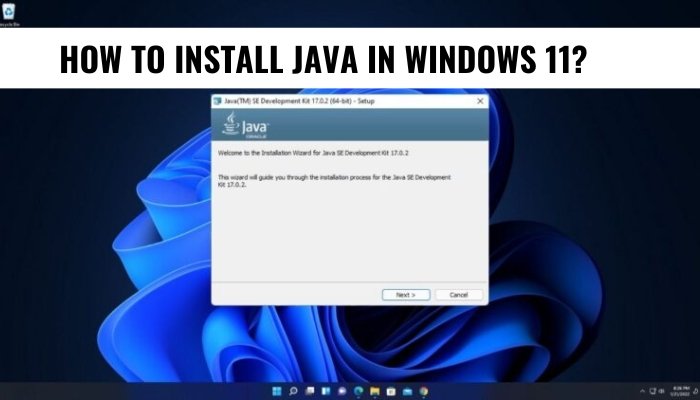
1. Download the latest version of Java for Windows 11 from the Java website.
2. Once the download is finished, open the installer and follow the instructions.
3. Once the installation is complete, verify that Java is working correctly by visiting the Verify Java Version page.
4. You're now ready to use and develop Java applications on your Windows 11 machine.
Steps to Install Java in Windows 11
Java is a popular programming language used in many applications and websites. Installing Java in Windows 11 is a straightforward process, and it just takes a few steps.

This guide will walk through the steps necessary to adequately install Java in Windows 11.
Step 1: Download Java
The first step to installing Java in Windows 11 is to download the Java software from the official Java website. This will ensure that the correct version of Java is downloaded and installed. Go to the official Java website and select the download option for Windows 11. Once the download is complete, open the file and follow the on-screen instructions to install Java in Windows 11.
The installation should only take a few minutes. Once Java is successfully installed, the installation program will prompt the user to restart the computer.
Step 2: Check Java Version
Now that Java is installed in Windows 11, it is important to check the version of Java that is installed. This can be done by opening the Windows Command Prompt and typing in the command “java -version”. This will output the version number of Java that is installed in the system.
It is important to ensure that the correct version of Java is installed in the system. If the version is not correct, the user may have to uninstall the current version and download and install the correct version of Java.
Step 3: Set Java Home
The next step is to configure the Java Home environment variable in Windows 11. To do this, open the Windows Control Panel, select ‘System and Security’ and then select ‘System’.
This will open the System window. In the ‘Advanced system settings’ section, select ‘Environment Variables’. This will open the Environment Variables window. In this window, select ‘New’ and enter the path of the Java Home directory. This is usually the directory where Java is installed. Once this is done, click ‘OK’ and the environment variable is set.
Step 4: Configure Java Security
The last step is to configure the Java Security settings in Windows 11. To do this, open the Java Control Panel and select the ‘Security’ tab. In this tab, select the option to enable the ‘High’ security level.
This will enable the highest level of security for Java in Windows 11. Once this is done, click ‘OK’ and the security settings are set. Java is now installed and configured in Windows 11.
Step 5: Test Java Installation
Once Java is installed and configured in Windows 11, it is important to test the installation. To do this, open the Windows Command Prompt and type in the command “java –version”.
This will output the version number of Java that is installed in the system. If the version number is correct, then Java is successfully installed in Windows 11. If the version number is not correct, the user may have to uninstall the current version and download and install the correct version of Java.
Troubleshooting Java Installation Issues
If there are any issues with the Java installation in Windows 11, the user should check the Java log files. These log files can be found in the directory “C:\Program Files\Java\logs”.
The log files can help the user identify any issues with the Java installation and can be used to troubleshoot any installation issues. If the issue persists, the user should contact the Java support team for assistance.
Frequently Asked Questions
What is Java?
Java is a programming language and computing platform developed by Sun Microsystems in 1995. It is used for creating applications, applets and other programs that can be run on a variety of different platforms including Windows, Mac OSX, Linux and Solaris. Java has become a popular choice for developing enterprise-level applications, mobile applications and games.
How to Install Java in Windows 11?
Installing Java in Windows 11 is relatively straightforward. First, you need to download the correct version of Java from the official Oracle website. Once you have downloaded the file, open it and follow the on-screen instructions to install the Java Runtime Environment.
After the installation is complete, you will need to open the Control Panel and select “Java” from the list of installed programs. From there, you can configure the various Java settings and preferences.
What are the Benefits of Installing Java in Windows 11?
Installing Java in Windows 11 provides several benefits. Not only does it make it easier to develop Java-based applications, but it also ensures that your system is up-to-date with the latest security patches and bug fixes.
Additionally, using the latest version of Java can help to improve the performance of applications that rely on Java technology.
Are There Any Risks to Installing Java in Windows 11?
Although installing Java in Windows 11 is relatively safe, there are potential risks associated with it. It is important to always download the latest version of Java from the official Oracle website in order to ensure that your system is protected from any potential security threats.
Additionally, you should always be mindful of any changes to the program’s settings and preferences in order to ensure that they remain secure.
Is Java Compatible With Windows 11?
Yes, Java is fully compatible with Windows 11. In fact, it is one of the most popular operating systems for running Java applications. Additionally, Microsoft Edge, the default web browser in Windows 11, supports Java plugin and is able to run Java applets.
What Happens if I Don't Install Java in Windows 11?
If you don’t install Java in Windows 11, you won’t be able to run any Java-based applications or applets. Additionally, you won’t be able to take advantage of any of the security patches and bug fixes that come with the latest version of Java.
As such, it is strongly recommended that you download and install the latest version of Java in order to ensure that your system is secure and up-to-date.
How to Install Java JDK 19 on Windows 11?
Congratulations! You have now successfully installed Java in Windows 11! Installing Java can be a daunting task, but with the right knowledge and implementation, you now have a powerful tool at your disposal to help you develop and run Java applications.
With Java installed on your Windows 11 system, you are now well on your way to becoming a master of Java programming.
How to Optimize Windows 11
How to Optimize Windows 11 for Gaming
Related Posts

How to Update Nvidia Drivers Windows 11?
Does Autocad Support Windows 11?
Can You Set Up Windows 11 Without a Microsoft Account?

How to Fix Windows 11 Taskbar Not Working?
How to Fix Yellow Screen on Windows 11?
How to Fix Stretched Screen Windows 11?
