How to Change Mouse Pointer Color in Windows 10?
If you ever wanted to add a splash of color to your cursor, then you have come to the right place. In this article, we will discuss how to change your mouse pointer color in Windows 10.
Whether you are looking for a unique design to make your cursor stand out or just want to add a bit of flair to your desktop, this guide will show you how to get the job done.
By the end of this article, you will be able to customize your mouse pointer color and make your computing experience more enjoyable. So, let's dive right in!
To change mouse pointer color in Windows 10, open the Settings app and go to Ease of Access > Cursor & Pointer. Here, you can find the option ‘Change pointer color’, which you can use to select the color of your mouse pointer.
- Open Settings app.
- Go to Ease of Access.
- Go to Cursor & Pointer.
- Find the option ‘Change pointer color’.
- Select the color of your mouse pointer.
Overview of Changing Mouse Cursor Color in Windows 10
The ability to customize the look of your mouse pointer is a great way to customize Windows 10. Changing the mouse pointer color in Windows 10 is quite simple, and it only takes a few steps.

This article will guide you step-by-step through the process of changing the mouse pointer color in Windows 10.
Steps to Change Mouse Pointer Color in Windows 10
The first step to changing the mouse pointer color in Windows 10 is to open the Control Panel. To do this, press the Windows+X keys on your keyboard and select the Control Panel option. Once the Control Panel window is open, click on the Mouse option.
This will open up the Mouse Properties window. In this window, you will see the option to change the mouse pointer color. Click on the drop-down menu and select the color you want to use for your mouse pointer.
Checking the New Pointer Color
Once you have chosen the color for your mouse pointer, the next step is to check that the new pointer color has been applied.
To do this, hover your mouse pointer over different parts of the screen and note the change in color. If the color has changed, then the new pointer color has been applied successfully.
Adding More Customization Options
If you want to add more customization options to your mouse pointer, you can do so by clicking on the “Pointer Options” tab in the Mouse Properties window.
Here, you will find more options such as changing the pointer size, speed, and more.
Testing Your Changes
Once you have made all the changes you want to make, it is important to test them before exiting the Mouse Properties window.
To do this, move the mouse pointer around the screen and make sure that all the changes you have made have been applied successfully.
Related FAQ
How to Change Mouse Pointer Color in Windows 10?
Answer: To change the mouse pointer color in Windows 10, you will need to open the settings menu. To do this, click on the Start button, then select the Gear icon to open the Settings menu. From here, select “Ease of Access”, then “Cursor and Pointer”.
In this page, you will be able to select a color for the mouse pointer from the drop-down menu. You can also change the size and shape of the pointer from the options provided.
How to Troubleshoot Mouse Pointer Color Issues?
Answer: If you are having issues with the mouse pointer color, the first step is to make sure that you have the latest version of Windows 10 installed. Then, you will need to open the Settings menu and go to the “Ease of Access” section.
From here, select “Cursor and Pointer” and make sure that the correct color is selected. If the issue persists, you can try resetting the color scheme by selecting “Reset to Default”.
What are the Different Shapes of the Mouse Pointer in Windows 10?
Answer: In Windows 10, you can choose from a variety of shapes for the mouse pointer. These include the classic arrow, a dot, a crosshair, an hourglass, and a series of hand-shaped cursors.
You can also customize the size of each shape and choose from a range of colors. Additionally, you can enable animation for the mouse pointer to make it easier to track.
How to Change the Mouse Pointer Speed in Windows 10?
Answer: To change the mouse pointer speed in Windows 10, you will need to open the Settings menu and go to the “Devices” section. From here, select “Mouse”, then “Additional mouse options”.
In the “Pointer Options” tab, you can adjust the pointer speed using the slider. Additionally, you can enable or disable pointer trails from this page as well.
What are the Benefits of Changing the Mouse Pointer Color?
Answer: Changing the color of the mouse pointer can be beneficial in a number of ways. For example, changing the color can make the pointer easier to find on the screen, which can be helpful if you tend to lose track of it.
Additionally, it can also make it easier to distinguish the pointer from other elements on the screen. Finally, changing the color can also help reduce eye strain as it creates a more visually appealing experience.
How to Change the Mouse Pointer on a Laptop?
Answer: To change the mouse pointer on a laptop, you will need to open the Settings menu. To do this, click on the Start button, then select the Gear icon to open the Settings menu. From here, select “Ease of Access”, then “Cursor and Pointer”. In this page, you will be able to select a color for the mouse pointer from the drop-down menu.
You can also change the size and shape of the pointer from the options provided. Additionally, you can also enable or disable pointer trails from this page.
How To Change Mouse Pointer Color and Size in Windows 10?
If you want to customize your Windows 10 experience and make it your own, changing the mouse pointer color is a great way to do just that.
With just a few clicks, you can quickly and easily change the color of your mouse pointer to whatever you want. So go ahead and give your mouse a new look and feel today.
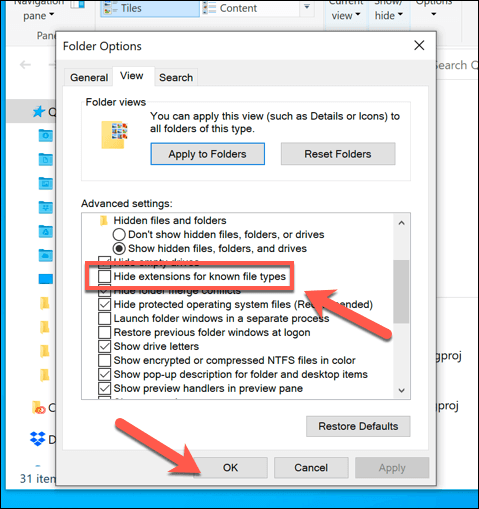
How to Change File Format in Windows 10?
How To Change Screensaver On Windows 10?
Related Posts
How to Change Screen Timeout Windows 10?
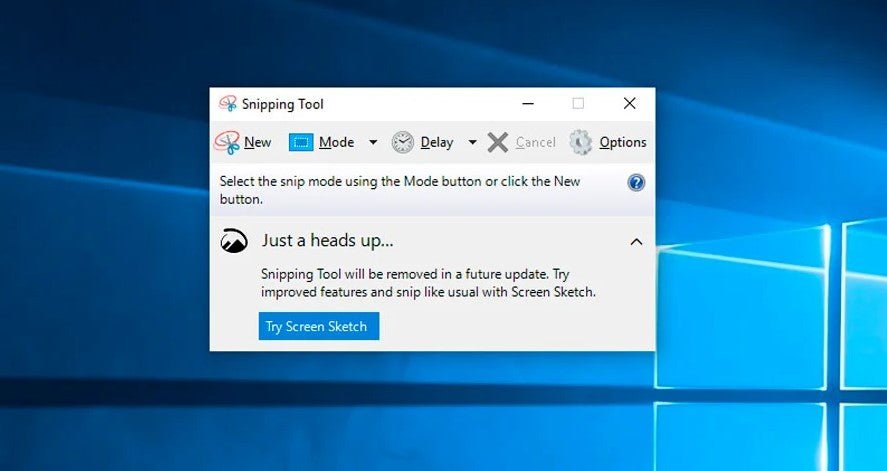
How To Use Snipping Tool In Windows 10?
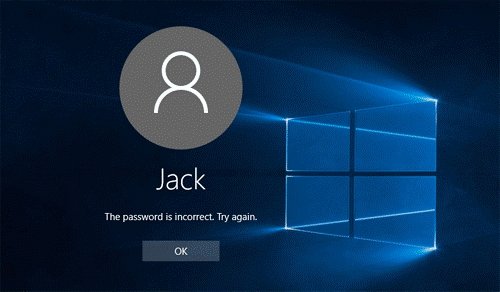
How To Unlock Windows 10 Without Password?
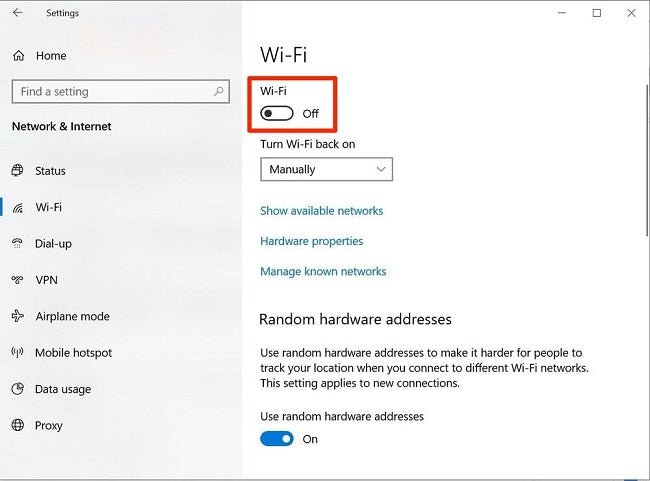
How To Turn On Wifi Windows 10?
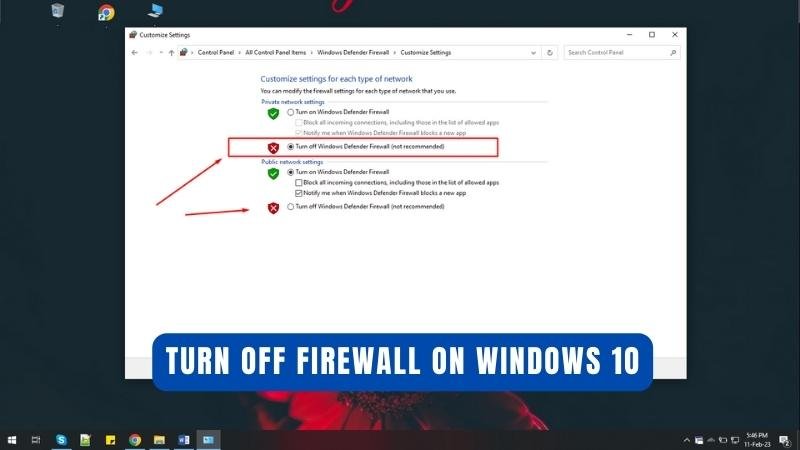
How to Turn Off Firewall on Windows 10?
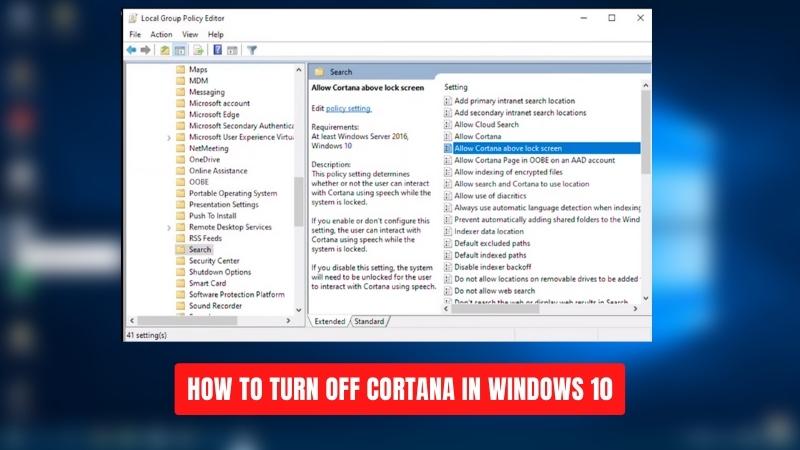
How To Turn Off Cortana In Windows 10?
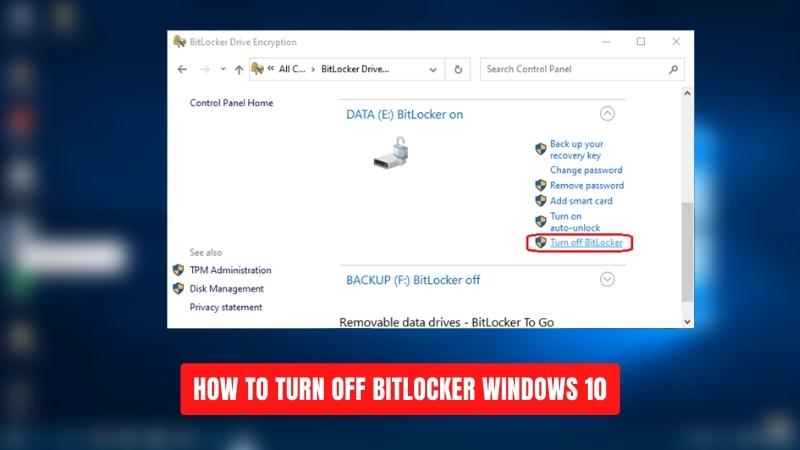
How To Turn Off Bitlocker Windows 10?