
How to Take Screenshot in Laptop Windows 7?
Do you have a laptop with Windows 7? Are you wondering how to take a screenshot? Taking a screenshot on a laptop running Windows 7 is actually quite easy. In this guide, I will show you the simple steps to take a screenshot on your laptop with Windows 7. By the end of this guide, you’ll be able to capture and save any image you want on your laptop. So let’s get started!
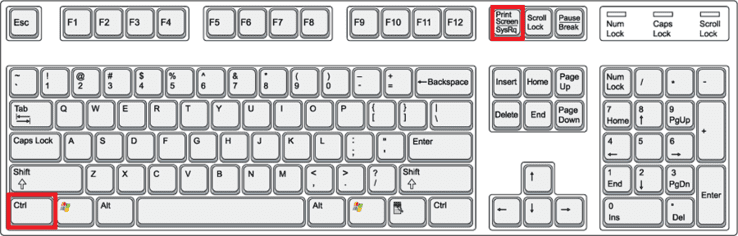
Taking a screenshot on a laptop running Windows 7 is simple and easy. All you need to do is press the PrtScn (Print Screen) key on your keyboard. This key is usually located above the Backspace and Insert keys.
- Step 1: Press the PrtScn (Print Screen) key on your keyboard.
- Step 2: Open an image editing program (such as Microsoft Paint, GIMP, or Adobe Photoshop).
- Step 3: Create a new image and press Ctrl + V to paste the screenshot.
- Step 4: Save the image.
This method works on any laptop running Windows 7.

Taking a Screenshot on a Windows 7 Laptop
Taking a screenshot on a Windows 7 laptop is easy and straightforward. The process involves pressing certain combinations of keys to capture the entire screen, or part of it, and save it as a file. This article will guide you through the steps of taking a screenshot, as well as how to crop, save, and share it.
Using the Print Screen Button
The Print Screen button on a Windows 7 laptop is typically located on the top row of the keyboard. It is usually labeled as “PrtScn,” “PrntScrn,” or “Print Scr.” To take a screenshot of the entire screen, press the Print Screen button. This will capture a screenshot of the entire display, including any windows that are open. To take a screenshot of just the active window, press Alt+Print Screen.
Saving the Screenshot
Once you have taken the screenshot, you can save it on your laptop’s hard drive. Open Paint, an image editing program that comes pre-installed with Windows 7. Press Ctrl+V to paste the screenshot into the Paint program. Then, press Ctrl+S to save the image. Enter a name for the file, select the file type you wish to save it as, and click Save.
Cropping the Screenshot
If you wish to crop the screenshot, open the image in Paint. Select the “Select” tool from the top menu, then click and drag to select the area of the image you want to keep. Press Ctrl+X to delete the unwanted area and then save the file.
Sharing the Screenshot
Once you have saved the screenshot, you can share it with others. If you have an email program installed, such as Outlook or Windows Live Mail, you can attach the screenshot file to an email and send it to the recipient. Alternately, you can upload the screenshot to a photo-sharing website or social media site.
Using Third-Party Screenshot Software
If you wish to take more advanced screenshots, such as scrolling windows or webpages, you can use a third-party screenshot program. These programs are available as free downloads and offer features such as annotation, capturing a specific area, and more. Once you have taken a screenshot, you can save, share, or edit it as needed.
Top 6 Frequently Asked Questions
What is a Screenshot?
A screenshot is a digital image of what is displayed on a laptop or computer monitor. It can be used to capture information that might otherwise be difficult to convey in words, such as a bug in a software program or a visual representation of a process. The screenshot can be saved as a file and shared with others.
How Do I Take a Screenshot on my Laptop Windows 7?
Taking a screenshot on a laptop running the Windows 7 operating system is simple. Press the “Print Screen” (PrtSc) button on your laptop keyboard. This will capture the entire screen, including any open windows. To capture only the active window, press the “Alt” and “Print Screen” keys at the same time. The screenshot can then be pasted into an image editing program or document.
What Image Editing Programs Can I Use?
There are a variety of image editing programs available for use with Windows 7. Some of the most popular include Microsoft Paint, Adobe Photoshop, and GIMP. These programs allow you to edit and save screenshots in various formats, such as JPG, PNG, and GIF.
Where are Screenshots Saved?
Screenshots taken on Windows 7 are saved to the Pictures folder by default. The screenshot can also be saved to a different folder of your choice by navigating to the folder and pressing “Ctrl+S” to save it.
Are There Alternatives to Taking a Screenshot?
There are several alternatives to taking a screenshot on a laptop running Windows 7. One option is to use the Windows Snipping Tool, which allows you to take a partial screenshot of any part of the screen. Another option is to use a third-party screen capture program such as Snagit or Greenshot.
Are Screenshots Secure?
Screenshots are generally secure, as long as they are not shared with other people without permission. It is best to save the screenshot to a secure folder on the laptop and encrypt the file if it contains sensitive information. It is also important to remember to delete any screenshots that are no longer needed.
How to take a Screenshot!!! – How to do a Screenshot on Windows 7 – Free & Easy
Taking screenshots on a laptop with Windows 7 is a great way to capture and share information quickly and easily. Whether you want to share a funny moment with friends or need to document a problem for tech support, knowing how to take a screenshot is an essential skill for any Windows 7 user. With just a few keystrokes, you can take a full-screen screenshot or capture a specific area of the screen. With the screenshot saved to your computer, you can attach it to an email, print it, or even share it on social media. Now that you know how to take screenshots in Windows 7, you can capture and share the world around you anytime you want.
How to Create a Team in Microsoft Teams?
How to Square on Excel?
Related Posts

Small businesses struggle with ERC tax credit submissions

10 Misunderstandings of the Employee Retention Credit

ERC Tax Credit 2023: Is the ERC tax credit still available?
