
How to Add Public Folder in Outlook?
Do you need to add a public folder to Outlook but aren’t sure how? In this guide, we will walk you through the steps of adding a public folder to Outlook, so you can access shared emails, contacts, and other items. With this comprehensive guide, you’ll be able to add public folders to Outlook quickly and easily. Let’s get started!
To add a public folder in Outlook:
- Open Outlook and go to File.
- Select Add Account.
- Choose Advanced Options and select Add shared folder.
- Enter the name of the folder in the Add this network location field.
- Click Add and then select Finish.
- The new folder will appear in your folder list.

Steps to Add Public Folder in Outlook
Adding a public folder in Outlook can be a great way to organize folders and emails within a workspace. It allows users to send emails to a shared folder that can be viewed by everyone, which makes collaboration much easier. In this article, we will discuss the steps to add a public folder in Outlook.
Step 1: Log in to Outlook
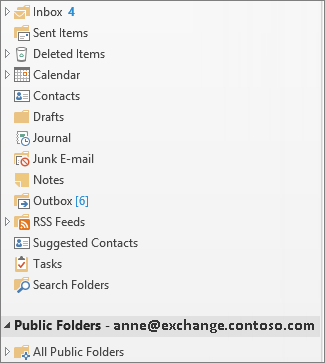
The first step to adding a public folder in Outlook is to log in to your Outlook account. Once you have logged in to your account, you will need to locate the “Folders” tab in the left-hand pane. Click on this tab to bring up a list of folders, where you will be able to see the “Public Folders” option. Click on this option to bring up a list of available public folders.
Step 2: Create a New Folder
If you want to create a new public folder, you will need to click on the “New Folder” option. This will bring up a dialog box where you can enter the name of the folder, as well as any other settings you want to apply to it. For example, you can choose to make the folder visible to everyone, or only to specific users. Once you have entered all of the desired information, click “OK” to create the folder.
Step 3: Add Emails to the Folder
Now that you have created your new public folder, you will need to add emails to it. To do this, simply select the emails you want to add to the folder, and then drag and drop them into the folder. If you want to add an email to multiple folders, you can do so by selecting the email and then right-clicking on it and selecting “Copy to Folder.” This will bring up a dialog box where you can select the folder(s) you want to add the email to.
Step 4: Share the Folder
Once you have added emails to the folder, you can share it with other users. To do this, simply click on the “Share” button in the folder’s toolbar. This will bring up a dialog box where you can enter the email addresses of the users you want to share the folder with. Once you have entered the email addresses, click “Share” to send an invitation to the selected users.
Step 5: Manage the Folder
Finally, you can manage the folder in a variety of ways. You can delete emails from the folder, move emails to other folders, and even change the name of the folder. To do this, simply right-click on the folder and select the appropriate option. You can also change the folder’s settings by clicking on the “Settings” button in the folder’s toolbar. This will bring up a dialog box where you can change the folder’s visibility, set permissions, and more.
Step 6: Access the Folder from Other Devices
If you want to access the folder from other devices, such as your mobile phone or tablet, you can do so by downloading the Outlook app. Once you have downloaded the app, you will be able to view and manage the public folder from any device.
Step 7: Delete the Folder
If you want to delete the folder, you can do so by right-clicking on it and selecting “Delete Folder.” This will remove the folder from your Outlook account and all emails in it will be deleted.
Few Frequently Asked Questions
What is a Public Folder?
A Public Folder is a folder that is stored on a Microsoft Exchange Server and is accessible to all users of the same Exchange Server. It can be used to store messages, contacts, and other items to share with other users. Public Folders can be used to store information such as company-wide announcements, shared calendars, shared contacts, and more.
Why would I need to add a Public Folder in Outlook?
Adding a Public Folder in Outlook is useful if you need more storage space than what is provided in your Exchange mailbox, or if you need to share information with other users in your organization. It also allows you to access content from other users’ mailboxes, such as shared contacts, shared calendars, and other items.
How do I add a Public Folder in Outlook?
To add a Public Folder in Outlook, you need to first open Outlook, then go to the “File” tab, and select “Account Settings”. In the “Account Settings” window, select the “Data Files” tab, and then click the “Add” button. In the “Add Data File” window, select the “Public Folders” tab, and then select the Public Folder that you want to add. Finally, click the “OK” button to save your changes.
What are the benefits of using a Public Folder?
Using a Public Folder provides several benefits, such as increased storage space, the ability to share information with other users in your organization, and the ability to access content from other users’ mailboxes. Public Folders are also secure, as they are stored on the Exchange Server and can only be accessed by authorized users.
Are Public Folders only available in Outlook?
No, Public Folders are available in other email clients as well, such as Apple Mail and Mozilla Thunderbird. However, the exact steps to add a Public Folder may vary depending on the email client you are using.
Are Public Folders the same as Shared Mailboxes?
No, Public Folders and Shared Mailboxes are two different types of storage options. Public Folders are stored on the Exchange Server and are accessible to all users of the same Exchange Server, while Shared Mailboxes are separate mailboxes that can be accessed by multiple users.
How to Access Public Folders in Outlook 2016 for Windows
Adding a public folder in Outlook is a great way to share information with a group of people. It is a very simple process that only requires a few steps. With the easy to follow instructions provided in this article, you can add a public folder to Outlook quickly and easily. Public folders are an efficient way to organize and share information with others in your organization. With this tool, you can easily store, organize and collaborate with others on important projects and tasks. With a few simple steps, you can have a public folder up and running in Outlook in no time.
How to Forward Calendar Invite in Outlook?
How to Stop a Sent Email in Outlook?
Related Posts

Small businesses struggle with ERC tax credit submissions

10 Misunderstandings of the Employee Retention Credit

ERC Tax Credit 2023: Is the ERC tax credit still available?
