
How to Use Split Screen on Windows 11
If you’re looking for a way to multitask more effectively on your Windows 11 device, then split screen is your best bet. Split screen allows you to divide your screen into two or more sections, so you can view and work on multiple windows at once. In this guide, we’ll show you how to use split screen on Windows 11 and explain the different ways you can set it up. Get ready to boost your productivity and take your multitasking skills to the next level!
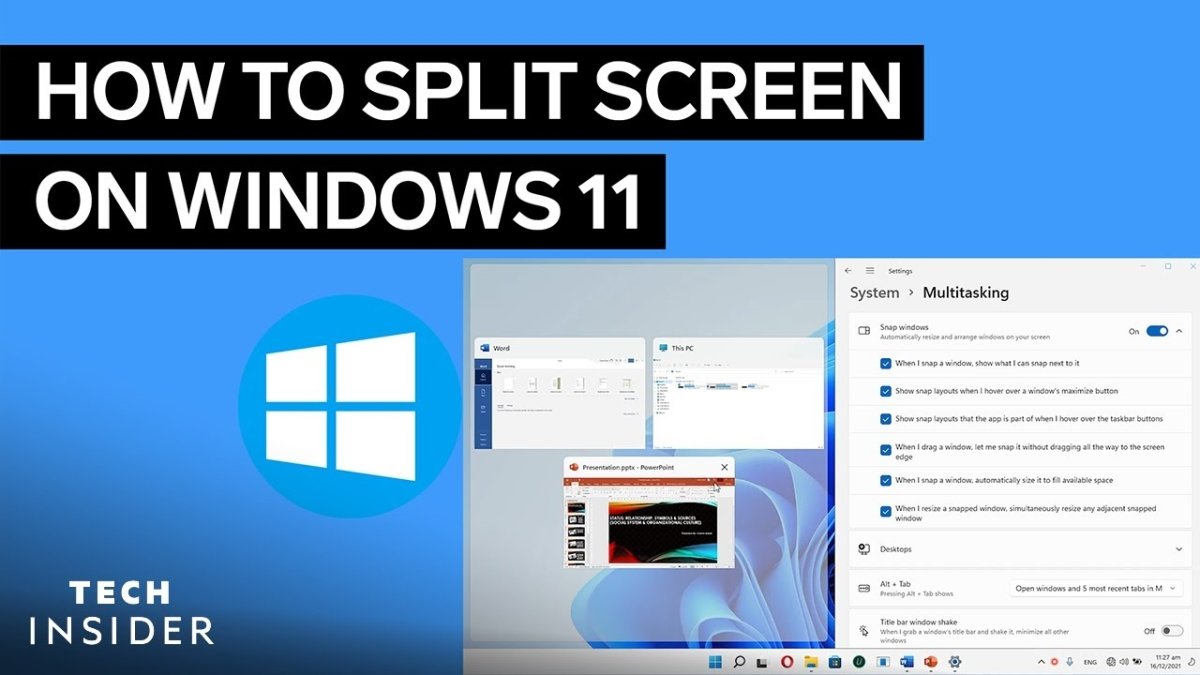
Split Screen on Windows 11: Windows 11 provides an easy way to split your screen into two parts. To use the split screen feature, press the Windows key + Left Arrow or Right Arrow to move the active window to one side of the screen. Then, open a new window, and press the Windows key + Up Arrow or Down Arrow to move it to the other side. Finally, adjust the size of the windows to your liking.

What is Split Screen?
Split screen is a feature that allows two or more applications to be displayed on a single screen at the same time. This feature is useful for multitasking and can help you be more productive by allowing you to work on two different programs at the same time. Split screen is available on Windows 11, so you can take advantage of this helpful feature.
Split screen is also known as window tiling or window splitting and it is a feature that is available on most modern operating systems. It allows you to divide the screen into two or more sections and run different programs in each section. This makes it easy to compare data from two different programs or to view two different websites side-by-side.
How to Use Split Screen on Windows 11
Using split screen on Windows 11 is a great way to increase your productivity and make multitasking easier. Here are the steps you need to take to use split screen on Windows 11:
Step 1: Open the applications you want to use
The first step is to open the applications or programs you want to use in split screen. This can be done by clicking the Start button on the Windows taskbar, then selecting the program you want to open. Alternatively, you can search for the program in the search bar. Once the application is open, you can move on to the next step.
Step 2: Resize the windows
Once the applications are open, you can begin to resize the windows. To do this, you can use the mouse to click and drag the edges of the window to resize it. You can also use the window’s menu bar to resize the window by selecting the “Size” option. Once you have resized the windows to your liking, you can move on to the next step.
Step 3: Activate Split Screen
Once the windows are resized, you can activate the split screen feature. To do this, you can right-click on an empty area of the taskbar and select the “Show Windows Side by Side” option. This will activate the split screen feature and the two windows will be displayed side-by-side.
Tips and Tricks for Using Split Screen on Windows 11
Using split screen on Windows 11 can be a great way to increase your productivity and make multitasking easier. Here are some tips and tricks to help you get the most out of the feature:
Use Keyboard Shortcuts
Using keyboard shortcuts can make using split screen on Windows 11 faster and easier. For example, you can press the Windows key + Left arrow to move a window to the left side of the screen, and the Windows key + Right arrow to move a window to the right side of the screen.
Adjust the Split Screen Ratio
The split screen ratio can be adjusted depending on your preferences. To do this, you can click and drag the split bar to adjust the ratio. This will make it easier to view both windows side-by-side.
Conclusion
Using split screen on Windows 11 is a great way to increase your productivity and make multitasking easier. With the right tips and tricks, you can make the most out of the feature and get more done in less time.
Frequently Asked Questions
Q1: What is Split Screen on Windows 11?
A1: Split Screen on Windows 11 is a feature that allows users to view two applications side by side on the same screen. It makes multitasking easier by providing the ability to work with two applications simultaneously. Split Screen can be used to view two documents or webpages side by side, watch a video while working on a document, or compare two different pieces of data quickly and easily.
Q2: How do I access Split Screen on Windows 11?
A2: Split Screen on Windows 11 can be accessed from the Taskbar. If you have two applications open, you can click and drag one of the application icons from the Taskbar to the right side of the screen until the application takes up half of the screen. You can then select the other application you wish to view on the left side of the screen.
Q3: How do I adjust the size of the windows when using Split Screen?
A3: When using Split Screen, you can adjust the size of each window by clicking and dragging the divider bar between the two windows. You can move the bar up and down to adjust the size of the windows, allowing one window to take up more or less space than the other.
Q4: How do I switch between applications on Split Screen?
A4: To switch between applications on Split Screen, simply click on the application you wish to switch to. This will bring the selected application to the front, allowing you to view and work with it. You can also switch between applications by clicking and dragging the divider bar between the two windows.
Q5: Can I move a window from Split Screen to Full Screen?
A5: Yes, you can move a window from Split Screen to Full Screen by clicking and dragging the window to the top of the screen. This will cause the window to expand to full screen, allowing you to work with it in a larger format.
Q6: Is there a keyboard shortcut to access Split Screen?
A6: Yes, there is a keyboard shortcut to access Split Screen on Windows 11. You can press the Windows key + Left or Right arrow key to access the Split Screen feature. This will cause one of the open applications to take up half of the screen, allowing you to view two applications side by side.
How To Split Screen In Windows 11
Split screen is a great way to get more done on Windows 11. With just a few clicks, you can effortlessly tile multiple windows and apps side by side. Whether you’re a student, professional, or home user, split screen can help you multitask, increase productivity, and boost efficiency. Try it out and you won’t be disappointed!
How to Type Accents on Windows 11
How to Set Up Parental Controls on Windows 11
Related Posts

Small businesses struggle with ERC tax credit submissions

10 Misunderstandings of the Employee Retention Credit

ERC Tax Credit 2023: Is the ERC tax credit still available?
