

How to Make Powerpoint Slides Advance Automatically?
Are you looking to make your next Powerpoint presentation look more professional and streamlined? Have you ever wished that your slides would advance automatically so that you don’t have to click through them manually? Well, you’re in luck! In this article, we will discuss the simple steps you can take to make your Powerpoint slides advance automatically, so that you can focus more on engaging your audience and less on the technical aspects of your presentation. Let’s get started!
- Open the PowerPoint presentation.
- Go to the Slide Show tab.
- Check the box next to “On Mouse Click”.
- Uncheck the box next to “Manually”.
- Select the desired time delay from the drop-down menu.
- Click “Apply to All”.
- Save the presentation.
Making PowerPoint Slides Advance Automatically
Creating a PowerPoint presentation can be a time-consuming task, but it doesn’t have to be. By making your slides advance automatically, you can save time and make your presentation look more professional. Here’s how to make PowerPoint slides advance automatically.
Set the Automatically After Timer
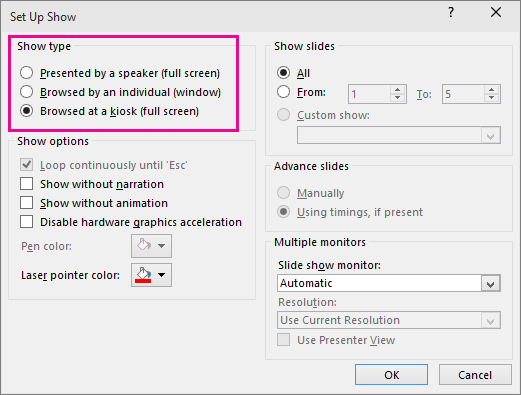
To make your slides advance automatically, you must first set the “Automatically After” timer. To do this, open your PowerPoint presentation and select the “Slide Show” tab. Then, click on the “Set Up Slide Show” button. In the “Set Up Show” dialogue box, select the “Automatically After” checkbox and enter a time for how long each slide will stay on the screen. Once you’ve done that, click “OK” to save your changes.
Adding Transitions to Slides
Adding transitions to your slides can help make your presentation look more professional. To add transitions to your slides, select the “Animations” tab and then click on the “Transitions” button. You can then select from a variety of transition effects. Once you’ve selected an effect, you can adjust the “Speed” and “Sound” of the transition. When you’re finished, click “Apply to All” to apply the transition to all of your slides.
Adding Animation Effects to Objects
Adding animation effects to objects on your slides can make your presentation more visually appealing. To do this, select the “Animations” tab and then click on the “Animations” button. You can then select from a variety of animation effects. Once you’ve selected an effect, you can adjust the “Speed” and “Sound” of the animation. When you’re finished, click “Apply to All” to apply the animation to all of the objects on your slide.
Rehearsing Your Presentation
Once you’ve set the timer and added transitions and animations to your slides, you can rehearse your presentation. To do this, open your presentation and select the “Slide Show” tab. Then, click on the “Rehearse Timings” button. This will allow you to practice your presentation and make sure that your slides are advancing at the correct speed.
Publishing Your Presentation
Once you’ve rehearsed your presentation and are satisfied with the timing, you can publish your presentation. To do this, open your presentation and select the “File” tab. Then, click on the “Publish” button. This will allow you to save your presentation as a video or as a PDF file.
Testing the Published Presentation
Before you share your presentation with others, you should test the published version to make sure that it is working correctly. To do this, open the published version of your presentation and select the “Slide Show” tab. Then, click on the “Start Slide Show” button. This will allow you to test the timing of your slides and make sure that they are advancing at the correct speed.
Sharing Your Presentation
Once you’ve tested the published version of your presentation, you can share it with others. To do this, select the “File” tab and click on the “Share” button. This will allow you to share your presentation with others via email or a file sharing service.
Saving Your Presentation
Once you’ve shared your presentation, you should save it so that you can access it later. To do this, open your presentation and select the “File” tab. Then, click on the “Save As” button. This will allow you to save your presentation in a variety of formats, including PowerPoint, PDF, and video.
Top 6 Frequently Asked Questions
Q1: What is the process for making PowerPoint slides advance automatically?
A1: To make PowerPoint slides advance automatically, you need to go to the “Transitions” tab on the ribbon. Then, select the “Timing” option. Once there, you can check the “Advance Slide” option, and then set a time for how long each slide should be displayed before it moves on to the next one. You can also set it up to move forward automatically after the specified time has elapsed. Additionally, you can set it up to advance the slides when you click your mouse or press the spacebar.
Q2: How do I add sound to an automatic slide advance in PowerPoint?
A2: To add sound to an automatic slide advance in PowerPoint, you need to go to the “Transitions” tab on the ribbon. Then, select the “Timing” option. Once there, you can click the “Play Sound” option and then choose a sound from the list of available sounds. You can also upload your own sound from a file. Additionally, you can set the sound to play when the slide advances, or when you click your mouse or press the spacebar.
Q3: How do I control the speed of an automatic slide advance in PowerPoint?
A3: To control the speed of an automatic slide advance in PowerPoint, you need to go to the “Transitions” tab on the ribbon. Then, select the “Timing” option. Once there, you can adjust the “Advance Slide After” option to select the amount of time that each slide should be displayed before it moves on to the next one. You can also set it to move forward automatically after the specified time has elapsed.
Q4: How do I prevent automatic slides from advancing in PowerPoint?
A4: To prevent automatic slides from advancing in PowerPoint, you need to go to the “Transitions” tab on the ribbon. Then, select the “Timing” option. Once there, you can uncheck the “Advance Slide” option. This will ensure that the slides will not advance until you manually advance them by clicking your mouse or pressing the spacebar.
Q5: How do I customize the transitions between slides in PowerPoint?
A5: To customize the transitions between slides in PowerPoint, you need to go to the “Transitions” tab on the ribbon. Then, select the “Transition to this Slide” option. Once there, you can select a transition from the list of available transitions, and customize the duration, sound, and other options. Additionally, you can also upload your own transition from a file.
Q6: How do I add animations to an automatic slide advance in PowerPoint?
A6: To add animations to an automatic slide advance in PowerPoint, you need to go to the “Animations” tab on the ribbon. Then, select the “Animation Pane” option. Once there, you can select an animation from the list of available animations and customize the speed, sound, and other options. Additionally, you can also upload your own animation from a file. Once you have added the animations, you can set them to play when the slide advances, or when you click your mouse or press the spacebar.
How to make PowerPoint Slides advance automatically (2021)
Making PowerPoint slides advance automatically is a great way to create a professional and captivating presentation that is sure to grab your audience’s attention. With a few easy steps, you can quickly set up your slides to advance at the speed that best suits your presentation. By following these simple steps, you’ll be able to create a presentation that is both engaging and visually appealing. With this new skill, you’ll be able to give a powerful and memorable presentation that is sure to leave a lasting impression.
How to Print Out Powerpoint Slides With Notes?
How to Use Design Ideas in Powerpoint?
Related Posts

Small businesses struggle with ERC tax credit submissions

10 Misunderstandings of the Employee Retention Credit

ERC Tax Credit 2023: Is the ERC tax credit still available?
