
How to Crop a Picture Windows 10?
Do you want to learn how to crop a picture on Windows 10? Cropping a picture can be a great way to adjust the focus of the photo and create a more aesthetically pleasing image. Whether you’re looking to crop a picture for professional or personal use, it’s easy to do with Windows 10. In this guide, we’ll walk you through the steps of how to crop a picture on Windows 10. So let’s get started!
How to Crop a Picture in Windows 10?
- Open the picture that you want to crop in the Photos app.
- Select the crop button from the toolbar.
- Choose the cropping option from the toolbar (e.g. Rectangular, Square, Freeform, etc).
- Adjust the selection area by dragging the corner or edges of the selection area.
- After adjusting the selection area, click the “Crop” button.
- The picture is now cropped.

Cropping Images in Windows 10
Cropping images is one of the most basic photo editing techniques available, and Windows 10 makes it easy for users to quickly crop their images. With the crop tools available in Windows 10, users can crop their images to any size or aspect ratio, as well as rotate and flip the image. In this article, we’ll take a look at how to crop a picture in Windows 10.
The Basics of Cropping a Picture
The first step in cropping a picture in Windows 10 is to open the image in the Photos app. Once the image is open, click on the “Edit & Create” button in the top right corner of the screen. This will open up the image editor, which will give you access to all the features available for editing your image. To crop the image, click on the “Crop” button at the top of the screen. This will open up the crop tool, which will allow you to crop the image to any size and aspect ratio.
The crop tool also allows you to rotate and flip the image. To rotate the image, click on the “Rotate” button in the top left corner of the crop tool. You can then use the arrows to rotate the image in either direction. To flip the image, click on the “Flip” button in the top right corner of the crop tool. You can then use the arrows to flip the image in either direction.
Cropping the Image
Once you’ve selected the rotation and flip settings for your image, you can start cropping the image. To do this, simply click and drag the corners of the crop tool to adjust the size and shape of the crop area. You can also adjust the aspect ratio of the crop area by clicking and dragging the corner handles. Once you’re happy with the crop area, click the “Apply” button to apply the crop to the image.
You can also use the “Zoom” slider at the bottom of the crop tool to zoom in and out of the image. This is helpful if you need to make more precise adjustments to the crop area. Once you’re finished cropping the image, click the “Save” button to save your changes.
Saving the Cropped Image
Once you’ve finished cropping and saving the image, you can choose to save it in any of the image formats supported by Windows 10. To do this, click on the “File” menu at the top of the screen and select “Save As.” This will open up a window where you can select the format you’d like to use for saving the image, as well as a location for saving the image. Once you’ve selected the format and location, click the “Save” button to save the cropped image.
Using the Cropped Image
Once you’ve saved the cropped image, you can use it in any application or website that supports the image format you’ve chosen. You can also upload it to social media sites like Facebook, Twitter, and Instagram, or use it as a desktop or mobile wallpaper.
Sharing the Cropped Image
If you’d like to share the cropped image with someone else, you can do so by using the Windows 10 sharing options. To access the sharing options, click on the “Share” button at the top of the screen. This will open up a window where you can select a number of sharing options, such as email, Facebook, Twitter, and more. Once you’ve selected the sharing option, you can enter the recipient’s email address or username and click the “Share” button to share the cropped image.
Using Other Cropping Options
If you’d like to use additional cropping options, such as resizing, rotating, or flipping the image, you can do so by using the “Advanced” button in the crop tool. This will open up a window where you can select these additional cropping options. Once you’re finished making your changes, click the “Apply” button to apply the changes to the image.
Conclusion
Cropping a picture in Windows 10 is a simple process that anyone can do. With the crop tools available in Windows 10, users can easily crop their images to any size or aspect ratio, as well as rotate and flip the image. Once the image is cropped, users can save it in any image format, use it in any application or website, upload it to social media sites, or share it with others using the Windows 10 sharing options.
Related FAQ
What is the difference between cropping and resizing a picture?
Cropping and resizing a picture are two different operations. When cropping a picture, you are removing parts of the image to focus on the part you want to keep. Resizing a picture, on the other hand, does not remove any part of the image, but instead changes the dimensions of the whole image. You can resize an image to make it larger or smaller, or to fit a certain size.
How do I crop a picture in Windows 10?
To crop a picture in Windows 10, open the picture in the Photos app. Select the crop icon at the top of the screen and then use your mouse to select the area of the image you want to keep. You can also adjust the aspect ratio of the image to fit a certain size or shape. When you’re done, click the ‘Done’ button to save the changes.
What tools are available to crop a picture in Windows 10?
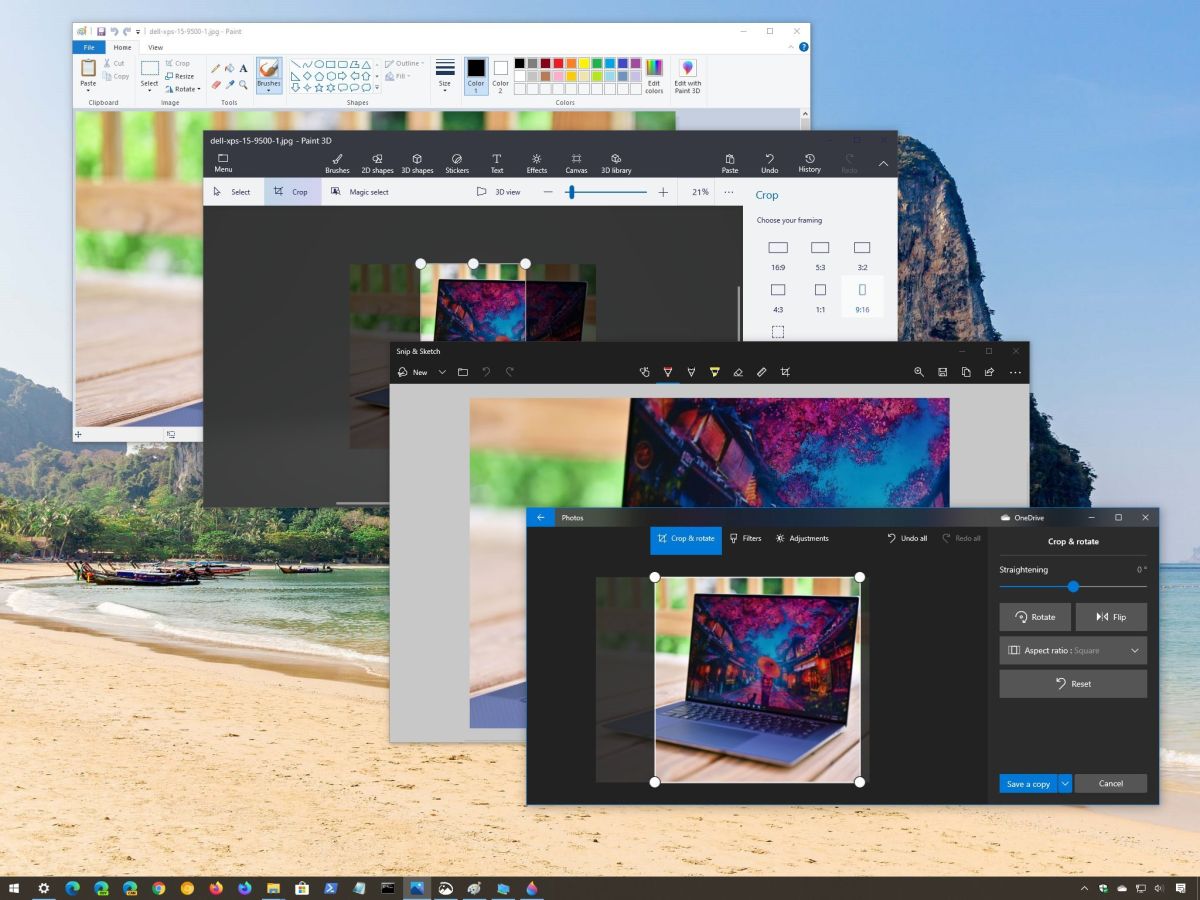
Windows 10 includes several tools for cropping a picture. The default tool is the Photos app, which allows you to quickly crop a picture with a few simple clicks. Other tools available include Paint, which has a more complex cropping tool, and various third-party apps and programs that can be downloaded from the Windows Store.
Can I crop a picture in Word?
Yes, you can crop a picture in Word. To do so, open the picture in Word and select the ‘Crop’ button in the ribbon at the top of the screen. You will then be able to drag the crop handles to select the area of the image you want to keep. When you’re done, click the ‘Done’ button to save the changes.
How do I rotate a picture in Windows 10?
To rotate a picture in Windows 10, open the picture in the Photos app. Select the rotate icon at the top of the screen and then use your mouse to drag the image in the direction you want to rotate it. You can also use the rotate buttons to rotate the image in 90 degree increments. When you’re done, click the ‘Done’ button to save the changes.
Can I crop a picture on my phone?
Yes, you can crop a picture on your phone. Most phones come with a built-in photo editor that includes a crop tool. Alternatively, you can download a third-party app from your app store that will allow you to crop pictures. Most of these apps are easy to use and provide additional editing options such as filters and effects.
How to crop an image in Windows 10
Cropping a picture on Windows 10 is a simple and straightforward task that anyone can do with minimal effort and time. With the help of the built-in cropping tool and a few clicks of the mouse, you can quickly and easily crop any picture to your desired size and shape. So, if you want to get creative with your pictures and make them look their best, cropping them on Windows 10 is the way to go!
How to Set Up a New Computer With Windows 10?
How To Screenshot On Asus Laptop Windows 10?
Related Posts

Small businesses struggle with ERC tax credit submissions

10 Misunderstandings of the Employee Retention Credit

ERC Tax Credit 2023: Is the ERC tax credit still available?
