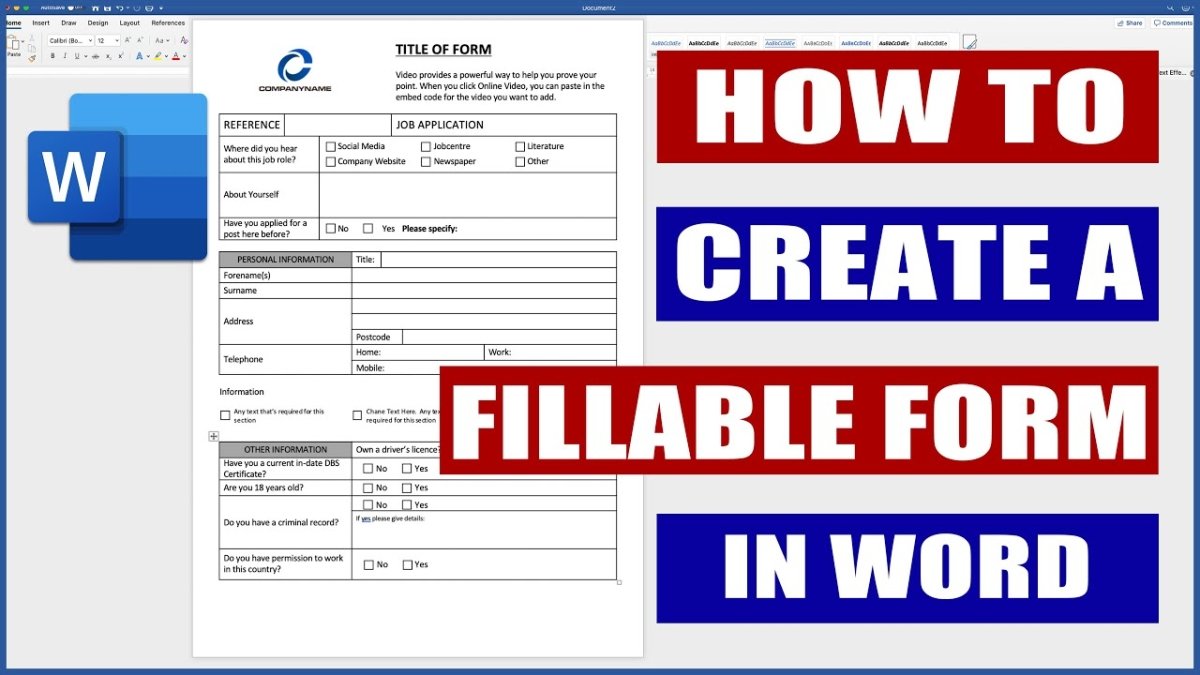
How to Create a Form in Microsoft Word?
Are you looking for an easy way to create a form in Microsoft Word that looks professional and is easy to use? Microsoft Word is a powerful application that can help you create forms quickly and easily, allowing you to customize the form to fit your needs. In this guide, we’ll show you step-by-step how to create a form in Microsoft Word and make the most out of its features.
Creating Forms in Microsoft Word is easy. Using the Developer tab, you can create a form in Microsoft Word by following these steps.
- Open Microsoft Word and click on the “Developer” tab.
- Select the “Legacy Tools” option from the Controls group.
- Choose the “Text Form Field” button from the drop-down list.
- Click anywhere in your document to place the field.
- Enter the prompt text into the “Bookmark” box.
- Select the type of form field you want to create.
- Adjust the size of the form field as desired.
- Choose the “Protection” tab and select the “Locked” option.
- Click “OK” to save your form field.
Once you have created the form fields, you can save the document as a template for future use.
Create a Form in Microsoft Word
Microsoft Word allows users to create various types of forms, such as surveys, questionnaires, and registration forms. Creating a form in Microsoft Word is a simple and straightforward process that requires minimal technical knowledge. This article will show you how to create a form in Microsoft Word.
Step 1: Open a New Document
The first step in creating a form in Microsoft Word is to open a new document. To do this, click the “File” tab in the top left corner of the screen and then click “New”. From there, select the type of document you want to create (e.g. a survey or questionnaire).
Step 2: Design the Form
Once you have opened a new document, you can begin designing the form. Start by adding the necessary information fields, such as name, address, and email address. You can also add radio buttons, checkboxes, and drop-down lists to create interactive elements.
Step 3: Insert Tables & Graphics
If you want to add tables or graphics to your form, you can do so by clicking the “Insert” tab in the top menu bar. From there, you can choose to insert a table, chart, or graphic into your document.
Format the Form
Step 1: Change the Document Margins
To change the margins of your document, click the “Page Layout” tab in the top menu bar and then click “Margins”. From there, you can choose the desired margin size for your document.
Step 2: Add Page Numbers
The next step is to add page numbers to your document. To do this, click the “Insert” tab in the top menu bar and then click “Page Number”. This will open a window where you can choose the page number style and position.
Step 3: Add a Header & Footer
Finally, you can add a header and footer to your document. To do this, click the “Insert” tab in the top menu bar and then click “Header & Footer”. From there, you can add text and images to your header and footer.
Check the Form
Step 1: Proofread the Document
Before you send out your form, it is important to proofread it to make sure there are no typos or errors. To do this, click the “Review” tab in the top menu bar and then click “Spelling & Grammar”.
Step 2: Check the Formatting
It is also important to check the formatting of your document. To do this, click the “Page Layout” tab in the top menu bar and then click “Page Setup”. From there, you can check the page size, orientation, and margins.
Print & Distribute the Form
Step 1: Print the Document
Once you have checked and proofread the document, you can print it out. To do this, click the “File” tab in the top menu bar and then click “Print”.
Step 2: Distribute the Document
Finally, you can distribute the document to the desired recipients. This can be done by email, snail mail, or any other method of distribution.
Frequently Asked Questions
1. How do I create a form in Microsoft Word?
Creating a form in Microsoft Word is easy! First, open up a blank document in Microsoft Word. Click on the “Insert” tab and then select “Form” from the ribbon. This will open up the Forms toolbar. From here, you can select the type of form field you would like to add to your document, such as a text box, check box, or drop-down menu. Once you have added the field, you can customize it to fit your specific needs. You can also add additional fields by clicking the “New Field” button in the Forms toolbar. Once you have finished creating your form, you can save it to your computer for future use or print it out for distribution.
2. How do I add an image to my form?
Adding an image to your form is simple! First, click on the “Insert” tab and then select “Picture.” This will open a file explorer window where you can choose the image you would like to add. Once you have selected the image, it will be inserted into your form. You can then resize and move the image to the desired location. You can also add additional images by clicking the “New Picture” button in the Forms toolbar.
3. How do I customize my form?
Customizing your form is easy! First, click on the “Design” tab in the Forms toolbar. This will open up a range of options for customizing your form. You can customize the overall look of the form, such as the font, size, and color. You can also add a header, footer, and other elements to the form. You can also add additional fields by clicking the “New Field” button in the Forms toolbar.
4. How do I add a drop-down menu to my form?
Adding a drop-down menu to your form is simple! First, click on the “Insert” tab and then select “Drop-Down” from the ribbon. This will open up the Drop-Down menu dialog box. From here, you can enter the options you would like to appear in your drop-down menu. Once you have finished entering the options, click “OK” to save the changes. The drop-down menu will then be added to your form and you can customize it further by right-clicking on the menu and selecting “Format”.
5. How do I add a check box to my form?
Adding a check box to your form is easy! First, click on the “Insert” tab and then select “Check Box” from the ribbon. This will open up the Check Box dialog box. From here, you can enter the options you would like to appear in your check box. Once you have finished entering the options, click “OK” to save the changes. The check box will then be added to your form and you can customize it further by right-clicking on the check box and selecting “Format”.
6. How do I print my form?
Printing your form is simple! First, click on the “File” tab and then select “Print”. This will open up the Print dialog box. From here, you can select the printer you would like to use and the number of copies you would like to print. Once you have finished making your selections, click “Print” to send the document to the printer. Your form will then be printed and ready for distribution.
Creating forms in Microsoft Word is an easy and efficient way to collect data in a professional and organized manner. With a few clicks of your mouse, you can create a form that collects all the information you need. You can customize your form to include the questions you need to ask and add additional features such as checkboxes, drop-down menus, and even formatted text. With Microsoft Word, you can create forms quickly and easily, ensuring that you have the data you need to make the best decisions.
How to Use Microsoft Word as a Desktop Publishing Tool?
How to Get Money on Your Microsoft Account?
Related Posts

What if You Forgot Your Microsoft Account Password?
What to Do if I Forgot My Microsoft Account Password?
What is My Microsoft Account Name?

What if You Forget Your Microsoft Account Password?