
How to Draw on Microsoft Word Online?
Are you looking to create a professional document or presentation but don’t have the time or money to invest in expensive graphics programs? Well, you’re in luck! Microsoft Word Online offers a great solution for those who want to draw pictures, shapes and text to their documents without having to install any software. In this article, we’ll show you how to easily draw on Microsoft Word Online.
How to Draw on Microsoft Word Online?
To draw on Microsoft Word Online, follow these steps:
- Open the Microsoft Word Online document to which you want to add a drawing.
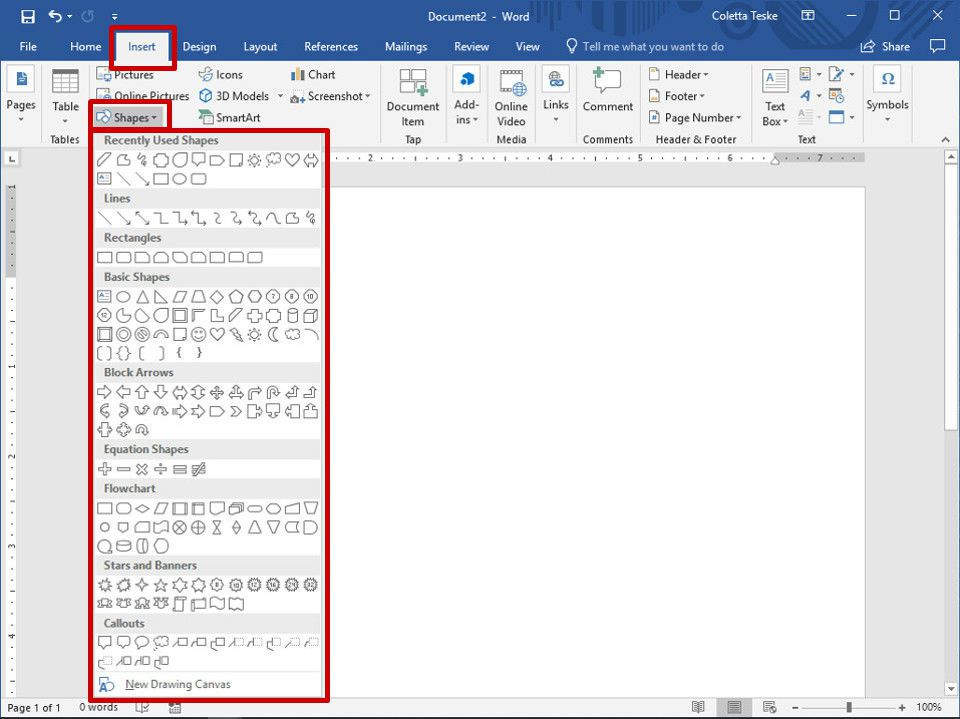
- Click the “Insert” tab and select “Drawing”.
- Choose the shape you want to draw, such as a line, circle, rectangle, or free-form shape.
- Click and drag your mouse to draw your shape.
- When you’re finished, click the “Save & Close” button.
You can also customize the color, size, and style of the drawing using the options in the Drawing Tools Format tab.
Steps to Draw on Microsoft Word Online
Drawing on Microsoft Word online is a great way to add visual elements to your documents. Whether you’re creating a newsletter, a presentation, or a graph, Microsoft Word Online allows you to easily draw shapes, lines, and text to help convey your message. Here are some steps to help you get started.
Step 1: Select the “Drawing” Tool
The first step in drawing on Microsoft Word Online is to select the “Drawing” tool from the Insert tab. This will open up a set of drawing tools that you can use to create shapes, lines, and text. Once you’ve selected the tool, you can start drawing.
Step 2: Choose a Shape or Line
The next step is to choose a shape or line to draw. Microsoft Word Online has a variety of shapes and lines that you can use to create a drawing. You can also create your own shapes by selecting the “Custom Shape” option. This will allow you to draw your own shapes with the drawing tools.
Step 3: Add Text to Your Drawing
Once you’ve created your shape or line, you can add text to it. To do this, select the “Text Box” tool from the drawing tools and then type in the text you want to include in your drawing. You can also select the font, size, and color of the text.
Step 4: Adjust Your Drawing
Once you’ve created your drawing, you can adjust it by selecting the “Format” option from the drawing tools. This will allow you to move, resize, and rotate your drawing. You can also apply color and texture to your drawing to make it more visually appealing.
Step 5: Save Your Drawing
Once you’ve finished creating and adjusting your drawing, you can save it to your document. To do this, select the “Save” option from the drawing tools. This will add your drawing to the document and it will be saved for future use.
Step 6: Copy and Paste Your Drawing
If you want to include your drawing in another document, you can copy and paste it from the original document. To do this, select the “Copy” option from the drawing tools and then paste it into the new document. This will allow you to easily include your drawing in multiple documents.
Step 7: Share Your Drawing
If you want to share your drawing with others, you can do so by selecting the “Share” option from the drawing tools. This will allow you to share your drawing with other users who have access to the document. You can also export your drawing as an image file and share it with others.
Few Frequently Asked Questions
Q1: What is Microsoft Word Online?
A1: Microsoft Word Online is a free web-based version of the popular Microsoft Word application. It is available as part of the Microsoft Office Online suite, which is accessible through any modern web browser. It provides users with the ability to create and edit documents online, as well as the ability to collaborate with other users in real-time. Word Online also provides users with the ability to draw on documents, making it a great tool for creative projects.
Q2: How do I access Microsoft Word Online?
A2: Microsoft Word Online can be accessed from any modern web browser. All you need to do is navigate to office.com, sign in with your Microsoft account, and then click the “Word Online” icon. Once you’ve launched Word Online, you can create a new document or open an existing document.
Q3: What features does Microsoft Word Online provide for drawing?
A3: Microsoft Word Online provides a variety of features for drawing, including the ability to draw basic shapes such as rectangles, circles, and arrows. It also has the ability to draw freeform lines, as well as tools for adding text, images, and tables. Additionally, Word Online also provides the ability to resize and move shapes, as well as the ability to customize the color and thickness of lines.
Q4: How do I draw on Microsoft Word Online?
A4: Drawing on Microsoft Word Online is easy and intuitive. Simply select the “Draw” tab at the top of the screen and then select the type of shape or line you’d like to draw. From there, you can draw the shape or line by clicking and dragging the mouse. Once you’ve drawn the shape or line, you can use the selection tools to customize its size, position, color, and thickness.
Q5: Can I add images to my drawings on Microsoft Word Online?
A5: Yes, you can add images to your drawings on Microsoft Word Online. To do this, simply select the “Insert” tab at the top of the screen and then choose “Pictures” from the drop-down menu. From there, you can select an image from your computer or from the web, and then drag and drop it onto the document. Once the image is added, you can use the selection tools to resize and move it.
Q6: Can I collaborate with others while drawing on Microsoft Word Online?
A6: Yes, you can collaborate with others while drawing on Microsoft Word Online. To do this, simply select the “Collaborate” tab at the top of the screen and then invite others to join your document. Once invited, they will be able to view and edit your document in real-time. This makes it easy to collaborate with others on creative projects.
How to Enable pen/draw tab|How to draw in MS WORD
Drawing on Microsoft Word Online can be a great way to quickly create visuals for presentations, flyers, and other documents. With a few simple steps, you can create a professional-looking drawing in minutes. All you need is a Microsoft account and the online version of Word. With the right tools and guidance, anyone can draw on Microsoft Word Online with ease. So, don’t be afraid to take the plunge and get creative with Word Online. You’ll be glad you did!
How to Sort by Color in Excel?
How to Stop Excel From Changing Numbers to Dates?
Related Posts

Small businesses struggle with ERC tax credit submissions

10 Misunderstandings of the Employee Retention Credit

ERC Tax Credit 2023: Is the ERC tax credit still available?
