How to Add Fonts to Microsoft Word Mac?
If you’d like to jazz up your Microsoft Word documents with a unique and attractive font, then you’ve come to the right place. In this guide, you’ll learn the different ways to add fonts to Microsoft Word Mac. We’ll take a look at the different options available to you, the benefits of using different fonts, and how to easily install them. By the end of this guide, you’ll be able to make your documents stand out with a variety of fonts. So let’s get started!
Adding fonts to Microsoft Word Mac is easy. Here’s how:
- Open Microsoft Word, and select the ‘Fonts’ option in the toolbar.
- In the Fonts window, select the ‘File’ menu, and then ‘Install New Font.’
- Locate the font file you wish to install, select it, and click ‘Open.’
- Once the font is installed, it should be available to use in Microsoft Word.
Adding Fonts to Microsoft Word Mac
Microsoft Word Mac allows users to easily add fonts to their documents. Users can experiment with different fonts and customize their documents accordingly. This article explains how to add fonts to Microsoft Word Mac.
Download New Fonts
The first step in adding fonts to Microsoft Word Mac is to download new fonts. There are many websites that offer free font downloads. Users can also purchase fonts from various font vendors. Once the fonts are downloaded, they must be installed on the computer.
The next step is to open the font file. This will open a window with a preview of the font. Users can click the “Install” button to install the font on the computer. The font will then appear in the font list.
Open Word Document
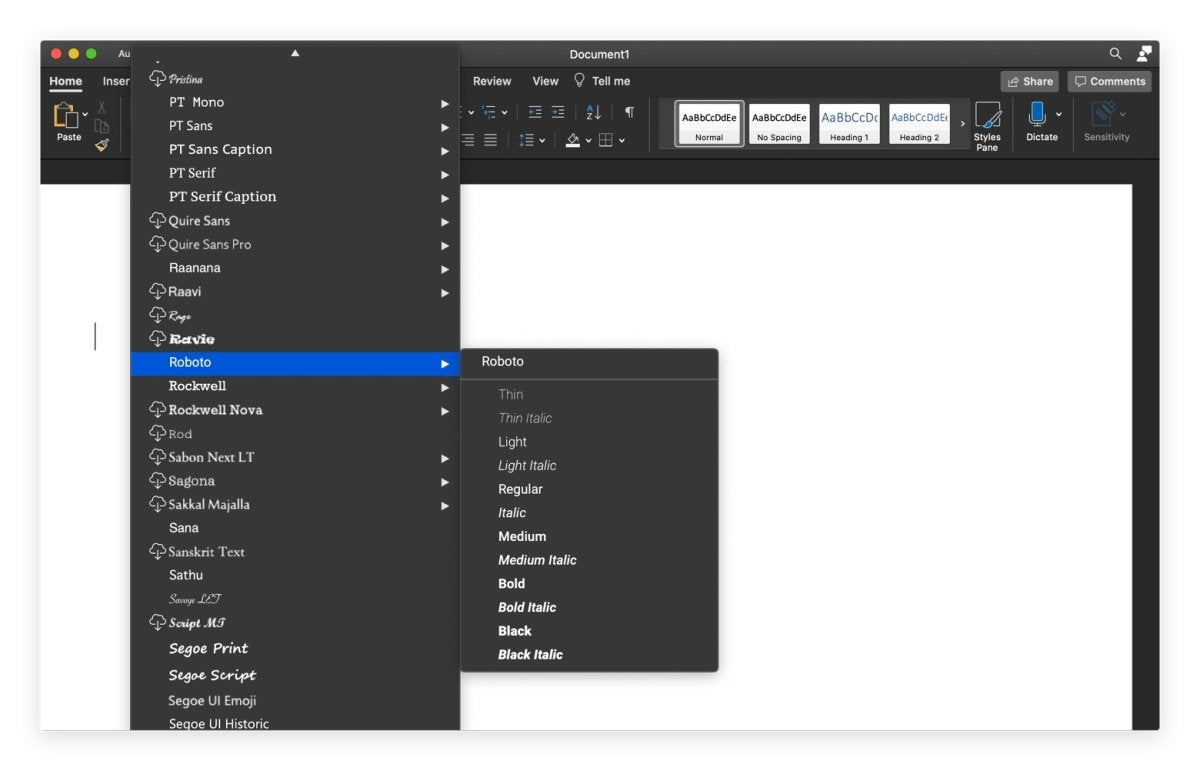
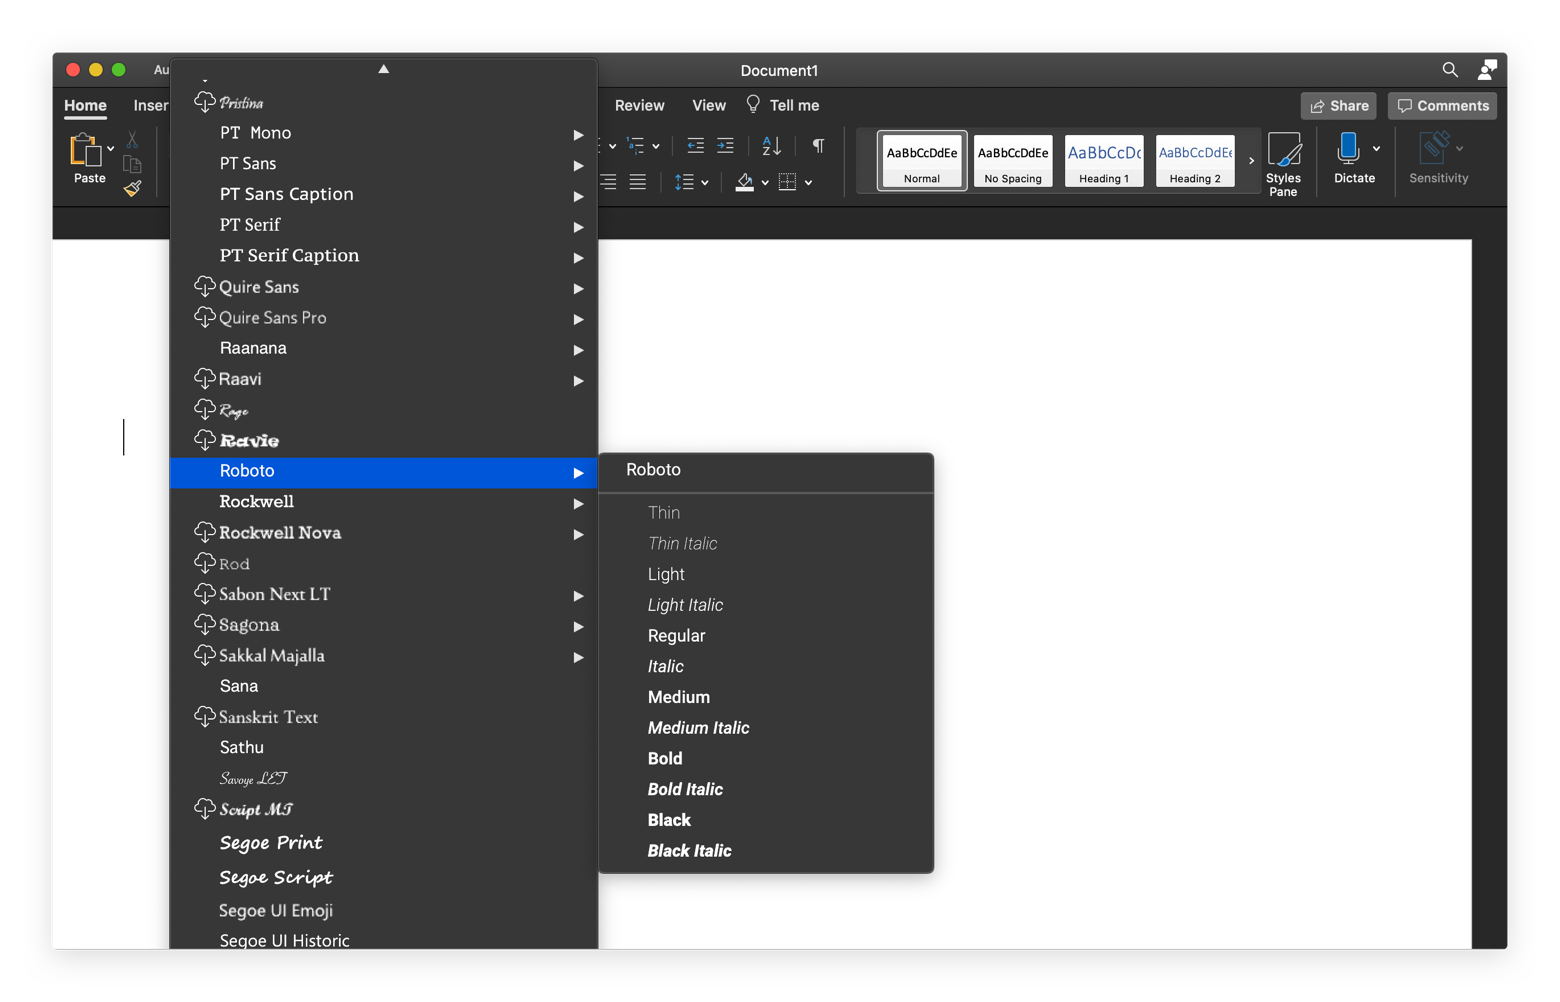
Once the font is installed, users can open a Word document and select the new font. To do this, click on the “Font” drop-down list and select the new font. The font will then be applied to the document. If the font is not visible, users can click “More Fonts” to view additional fonts.
Formatting the Font
Once the font is selected, users can further customize the font by changing its size, style, and color. To do this, click on the “Format” tab and select the appropriate options. These options can be used to fine-tune the font and make it stand out.
Using the Font
The final step is to use the font in the document. Users can type text in the font and style it accordingly. They can also use the font to create titles, headings, or other text elements.
Troubleshooting Fonts
If there are any issues with the font, users can check the font’s page to make sure it is installed correctly. If the font is not working properly, users can delete the font and re-install it. They can also contact the font vendor for assistance.
Saving the Document
Once the document is complete, users can save it. They can save the document in different formats, such as PDF, Word, or HTML. This will ensure that the font is preserved even after the document is shared or printed.
Conclusion
Adding fonts to Microsoft Word Mac is easy and straightforward. With a few simple steps, users can download, install, and use new fonts in their Word documents. This allows users to create unique and eye-catching documents that stand out from the crowd.
Top 6 Frequently Asked Questions
Q1. How do I add fonts to Microsoft Word on Mac?
Ans. Adding fonts to Microsoft Word on Mac is easy. All you have to do is open your Mac’s Font Book app. From here, you can browse through the available fonts and install any you wish to use. Once you have installed the fonts, they will appear in the fonts list within Microsoft Word and you can apply them to your documents.
Q2. What type of font formats are supported in Microsoft Word for Mac?
Ans. Microsoft Word for Mac supports a range of font formats, including TrueType (.ttf), OpenType (.otf), and PostScript (.ps) fonts. To ensure that your chosen font is compatible with Microsoft Word, make sure it is listed as one of these three formats.
Q3. How do I find more fonts to install?
Ans. There are many online sources where you can find fonts to install, such as Font Squirrel and DaFont. You can also purchase fonts from specialist font vendors like MyFonts. Once you have downloaded the font files, you can open them with Font Book and install them on your Mac.
Q4. Can I add fonts from a PC to a Mac Word document?
Ans. Yes, you can add fonts from a PC to a Mac Word document using the File > Install Fonts from File menu option. This will allow you to select a font file from your PC and install it on your Mac. Once installed, the font will be available to use in your Mac Word documents.
Q5. How do I delete fonts I no longer need?
Ans. To delete fonts you no longer need, open your Mac’s Font Book app and select the font you wish to delete. Then, click the delete (X) button at the bottom of the window. This will remove the font from your Mac and it will no longer be available in Microsoft Word.
Q6. Is there a limit to the number of fonts I can install?
Ans. The exact number of fonts you can install may depend on your Mac’s available memory, but there is no set limit. Generally speaking, you should be able to install as many fonts as you need without any issues. However, it is important to remember that too many fonts can slow down your Mac, so it is best to only install those you actually need.
How to Import Fonts in Microsoft Word on a Mac : Tech Yeah!
Adding fonts to Microsoft Word Mac can be a challenging task for many Mac users. But with the right steps, you can easily add the font of your choice to Microsoft Word Mac. Simply find the font you want, download the font file, and double click to install it. After that, you can find the font in the Fonts window and apply it to your documents in Microsoft Word Mac. With this guide, you should have no problem in adding fonts to Microsoft Word Mac.
How to Use Track Changes in Microsoft Word?
How to Print Front and Back on Microsoft Word?
Related Posts

What if You Forgot Your Microsoft Account Password?

What to Do if I Forgot My Microsoft Account Password?
What is My Microsoft Account Name?

What if You Forget Your Microsoft Account Password?