How to Install Wifi Driver in Windows 10?
Are you having trouble connecting to your wifi on your Windows 10 computer? If so, you’re not alone. Installing Wifi drivers can be a confusing and daunting task, but it doesn’t have to be. In this article, we’ll walk you through step-by-step instructions on how to install your Wifi driver in Windows 10. Whether you’re a tech-savvy user or a beginner, this guide will have you connected to your wireless network in no time. Let’s get started!
Installing a Wifi driver on Windows 10 is easy. First, you must download the appropriate driver for your device. You can do this by visiting the manufacturer's website, or using a driver update tool. Once you have the driver, you should open the file and follow the on-screen instructions to install it. After the installation is complete, you should see the driver listed in Device Manager.
Alternatively, if you are experiencing wifi issues, you can use the Windows 10 troubleshooter to fix any problems. To do this, open the Settings app and go to the Network & Internet section. Select the Troubleshoot option and then follow the on-screen instructions to fix any problems.
Step-by-Step Guide to Installing Wifi Driver on Windows 10
Installing a wifi driver on Windows 10 is not a difficult task, and it can be done in a few simple steps. All you need to do is follow the instructions given in this article. The first step is to download the wifi driver for your device. There are many websites where you can find the latest version of the driver, so make sure you download the most updated version.
After downloading the driver, you need to install it on your computer. This can be done by double-clicking on the downloaded file and following the instructions given in the setup wizard.
Enabling the Wifi Driver
Once the driver is installed, you need to enable it on your computer. To do this, you need to open the Device Manager on your computer. You can find this in the Control Panel. Once it is opened, you need to find the wifi driver in the list of devices. Right-click on it and select the “Enable” option. This will enable the wifi driver on your computer.
Verifying the Installation
After enabling the driver, you need to verify that it is working properly. To do this, you need to open the Network and Sharing Center on your computer. You can do this by typing “Network and Sharing Center” in the search box. Once it is opened, you need to click on the “Change Adapter Settings” option. This will open the list of available network connections. If you see the wifi connection in the list, it means that the driver is installed and working properly.
Connecting to a Wifi Network
Once the driver is installed and enabled, you can now connect to a wifi network. To do this, you need to click on the wifi icon in the system tray. This will open a list of available wifi networks. Select your desired network and enter the password if required. Once you are connected, you can start using the internet.
Troubleshooting Connection Issues
If you are having trouble connecting to the wifi network, there are a few steps you can take to try and resolve the issue. The first step is to check if the wifi driver is enabled. You can do this by opening the Device Manager and checking for the wifi driver. If it is not enabled, then you need to enable it.
Updating the Driver
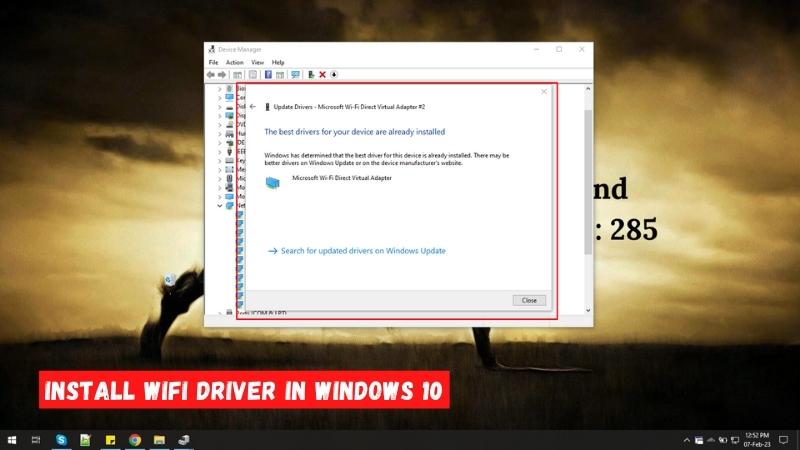
If the wifi driver is enabled but you are still having trouble connecting to the wifi network, then you may need to update the driver. To do this, you need to open the Device Manager and right-click on the wifi driver. Then select the “Update Driver” option. This will open the Windows Update window and you can follow the instructions to update the driver.
Resetting the Network Settings
If you are still having trouble connecting to the wifi network, then you may need to reset the network settings. To do this, you need to open the Network and Sharing Center and click on the “Change Adapter Settings” option. Then right-click on the wifi connection and select the “Reset” option. This will reset the network settings and you should be able to connect to the wifi network.
Related FAQ
Q1. What is a Wifi Driver?
A wifi driver is a piece of software that helps your operating system to recognize and connect to wireless networks and manage wireless connections. It allows you to access the internet, download files, and access other networks. Without a wifi driver, your device won’t be able to access the internet.
Q2. What are the benefits of installing a Wifi Driver?
The main benefit of installing a wifi driver is that it allows you to access the internet, download files, and access other networks without having to use an Ethernet cable. Additionally, it provides better security and performance over traditional wireless networks.
Q3. How do I install a Wifi Driver on Windows 10?
Installing a Wifi driver on Windows 10 is a straightforward process. First, you need to download the latest driver from the manufacturer’s website. Next, you need to open the Device Manager, locate the wireless adapter, and then click the “Update driver” button. Finally, you need to follow the instructions to complete the installation.
Q4. What should I do if the Wifi Driver installation fails?
If the wifi driver installation fails, you should first try to download the latest driver for your device from the manufacturer’s website. You can also try to use the “Roll Back” feature in the Device Manager to revert the driver to a previous version. If neither of these steps works, you should contact the manufacturer for assistance.
Q5. Do I need to restart my computer after installing a Wifi Driver?
Yes, it is recommended that you restart your computer after installing a wifi driver. This will make sure that the driver has been installed correctly and that all the necessary changes have been applied.
Q6. Is it safe to install a Wifi Driver from a third-party website?
It is not recommended to install a wifi driver from a third-party website. The driver may not be compatible with your device and could cause serious issues, such as system instability or security vulnerabilities. Additionally, the driver may be outdated or contain malicious software. It is always best to download the driver from the manufacturer’s website.
Windows 10 - How To Install Wifi Drivers
Installing a wifi driver in Windows 10 is not difficult, but it can be daunting if you are unfamiliar with the process. With this guide, you now know the steps to take to properly install a wifi driver in Windows 10. It is important to always exercise caution when making any changes to your system, and keeping your drivers up to date is a great way to ensure your system runs smoothly.
So, if you ever find yourself needing to install a wifi driver in Windows 10, you can now do it with confidence.
Final Thoughts
Installing a wifi driver on Windows 10 is not a difficult task, and it can be done in a few simple steps. All you need to do is download the latest version of the driver, install it, enable it, and then connect to a wifi network. If you are having trouble connecting to the wifi network, then you may need to update the driver or reset the network settings. With these steps, you should be able to install the wifi driver and get connected to the internet.
How to Make Custom Icons Windows 10?
How to Make Volume Louder on Windows 10?
Related Posts
How to Change Screen Timeout Windows 10?
How To Use Snipping Tool In Windows 10?

How To Unlock Windows 10 Without Password?
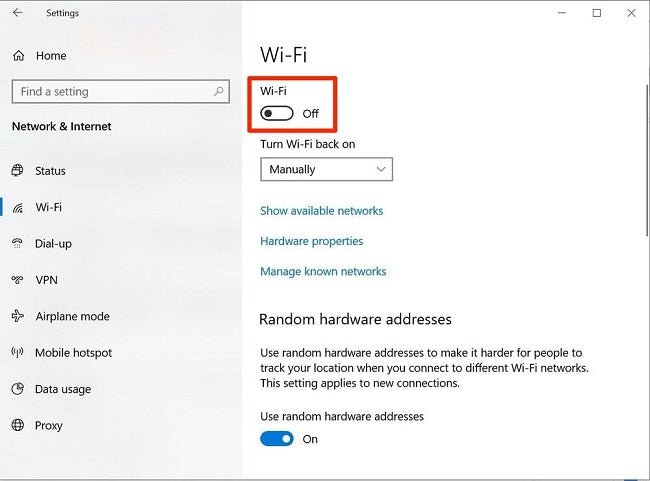
How To Turn On Wifi Windows 10?

How to Turn Off Firewall on Windows 10?

How To Turn Off Cortana In Windows 10?

How To Turn Off Bitlocker Windows 10?